

The diagnostic
The diagnostic that finds the weak spots in your technique
You practice, you repeat, and it still breaks down in the same spot... Trust me, we’ve all been there at some point. The problem is almost never a lack of work: it’s not knowing which exact motion is to blame. The RIFFLEX diagnostic answers that question with numbers, not gut feeling, not beliefs: based on what YOU actually play, not someone else.
N°01
Which finger combination limits you the most?
N°03
Which fingering do you usually have to grind the most to get it clean?
N°05
On which strings are your motions hardest to execute?
N°02
Which technique costs you the most BPM?
N°04
Which motion do you practice the most?
N°06
On stretches, which fingering gives you the most trouble?
So, could you answer them?
Are you sure? Is that a gut feeling, or have you actually measured it?
Between belief and reality there’s sometimes a nuance… and it can turn into a real difference.
Signs your technique has plateaued
If any of these sounds familiar, it isn’t a lack of talent. It’s a lack of data.
- It always breaks down in the same place (or close to it): the string skip, the position shift, that one bar of the solo. You can hear it, but you can’t tell whether it comes from your fretting hand, your picking hand or their timing.
- You practice blind, whichever way the wind blows: hours of playing with no plan, no numbers, no tracking. Nothing tells you whether you’re improving or going in circles.
- You’ve watched dozens of videos and kept no method: none of them know YOUR weak spots.
How the diagnostic works
The diagnostic takes three steps and no special gear: your guitar, plus a phone or computer with a camera.
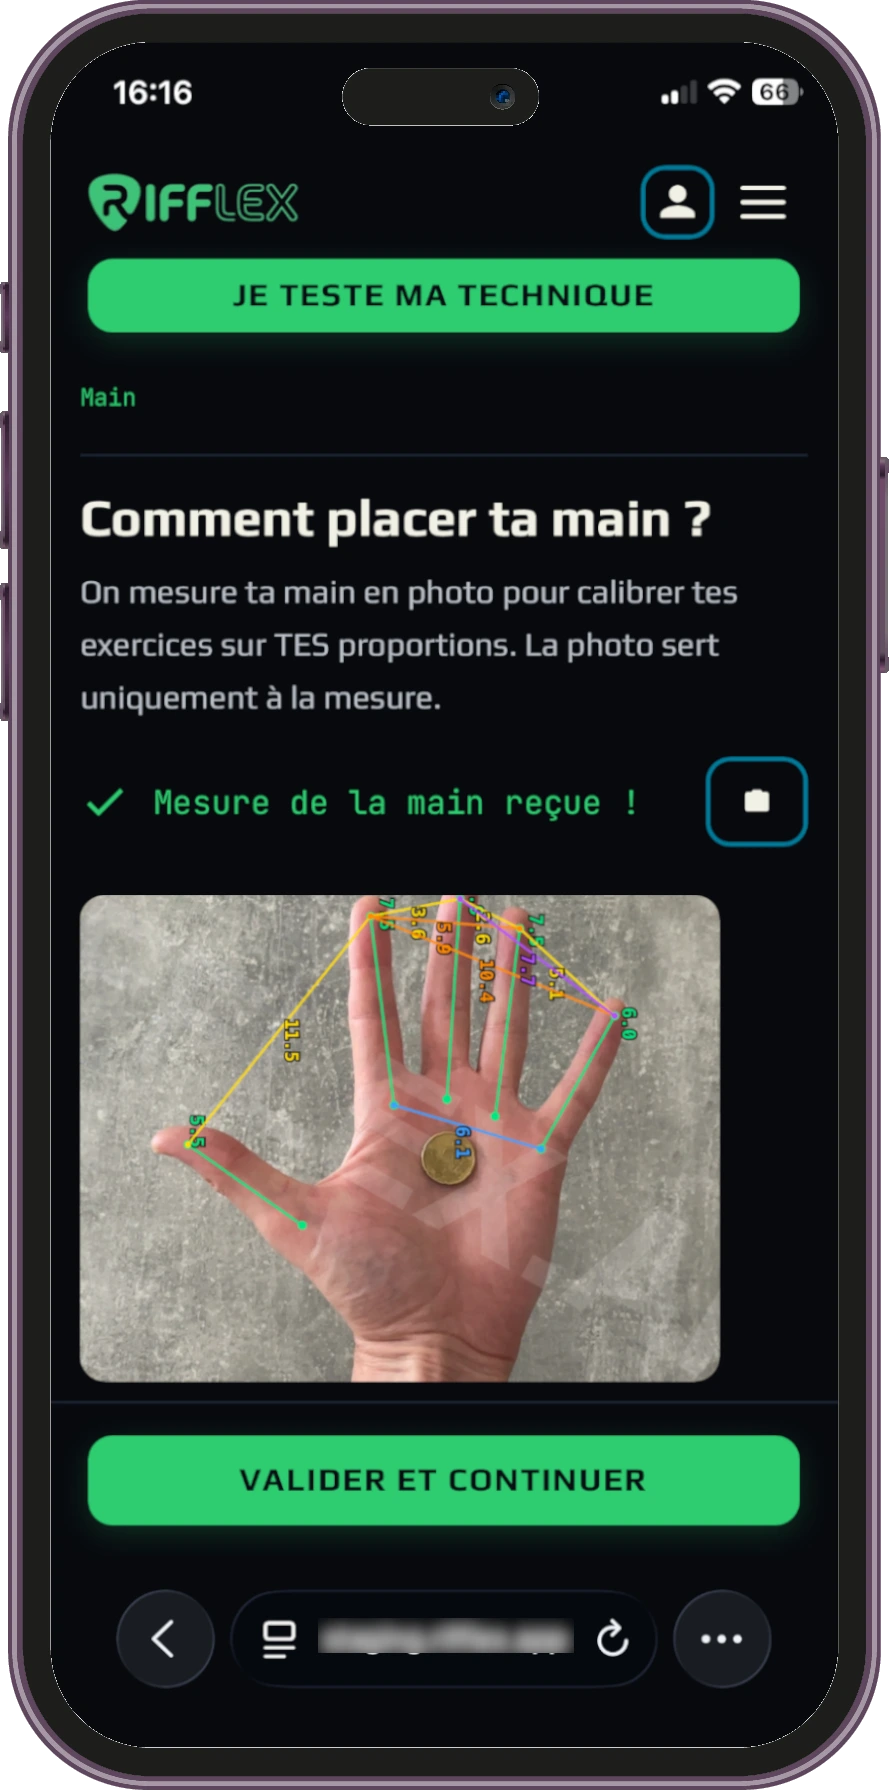
- You scan your hand (this is the first big friction point to remove). A few quick questions (left- or right-handed, sitting or standing), then the camera measures your hand width and finger length, and works out the potential spread between each pair of fingers: that’s what lets the tests adapt to your hand.
- You play tabs fitted to your hand. Frets and stretches are recalculated from your measurements, so you never play a generic tab designed for someone else’s hand.
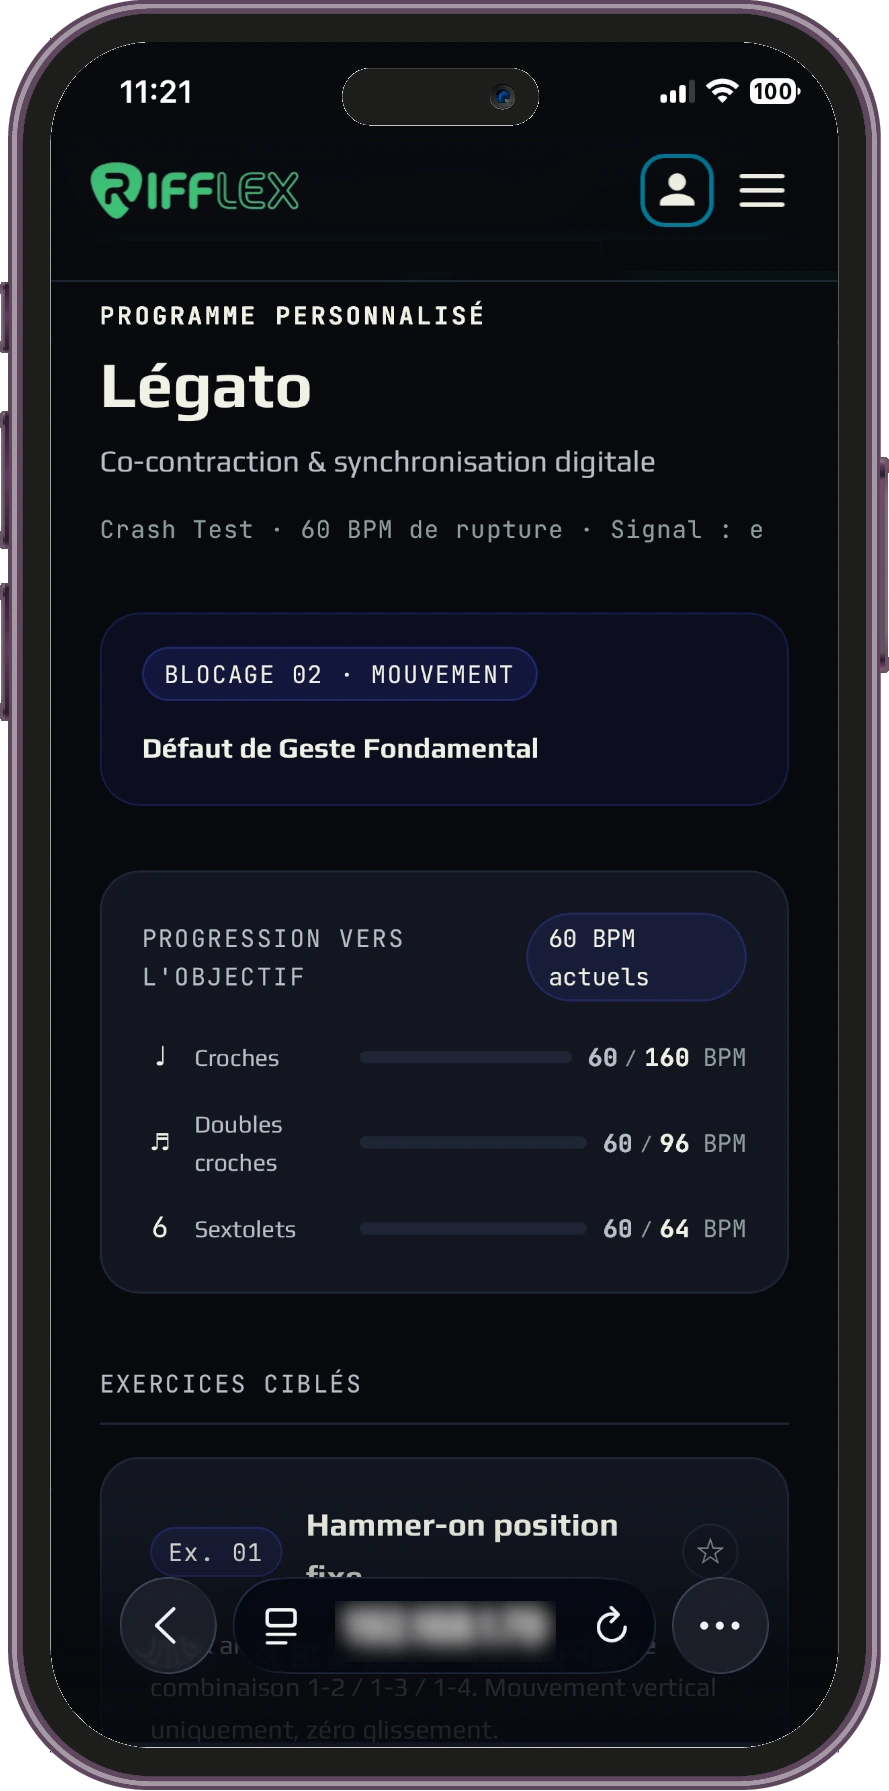
- You get a report after each stage of the diagnostic, then a final report once the full diagnostic is complete. Your tempos are compared exercise by exercise to isolate the motion slowing you down, then a practice plan tells you what to work on (in practice, you’re offered the technical exercises from the library that match your weak spots).
What the diagnostic measures
The first Crash Test covers legato (hammer-ons and pull-offs), the technique that best isolates your fretting hand. It moves through stages, each adding a single difficulty to the previous one, so any speed loss can be traced back to that difficulty and nothing else. The test exercises aren’t thrilling, but I didn’t want to compromise by making them “fun”: they’re mainly there to MEASURE, not to look pretty or be entertaining.
- Finger combinations: which pair of fingers limits you in a fixed position?
- Stretch: do you know what a forced spread between specific fingers costs you?
- String change: which finger pair handles crossing to the next string worst? And in which direction?
- Position shift: which finger and which direction slow you down along the neck?
- String skipping: what is the performance cost of skipping one or more strings instead of moving to the next one?
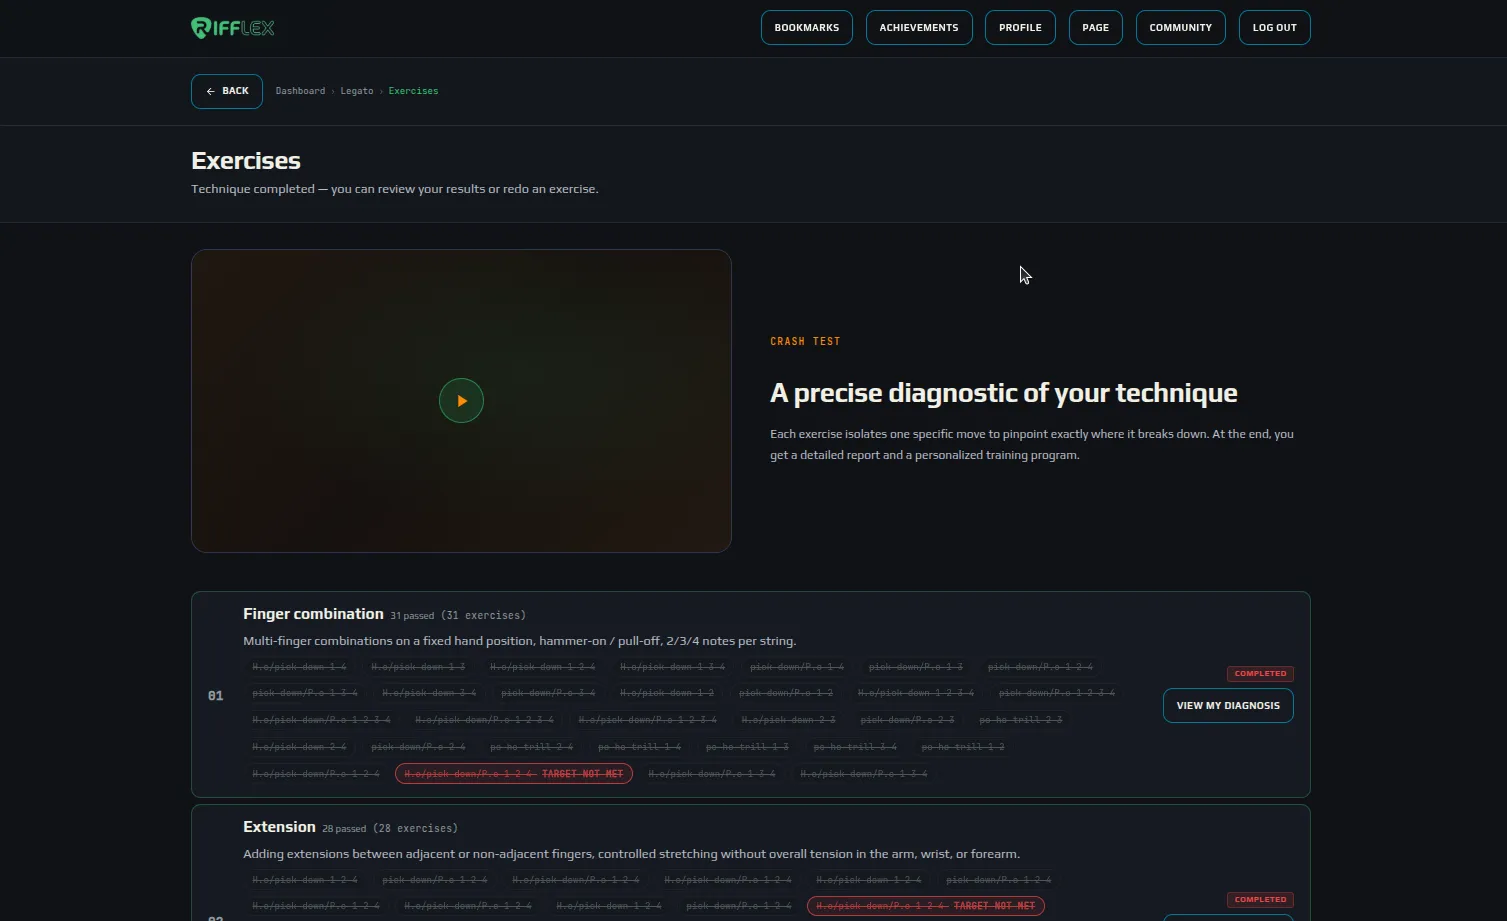
The legato Crash Test split into stages. Each stage groups its exercises; those whose target was missed stand out in red, and each finished stage opens its own diagnostic.
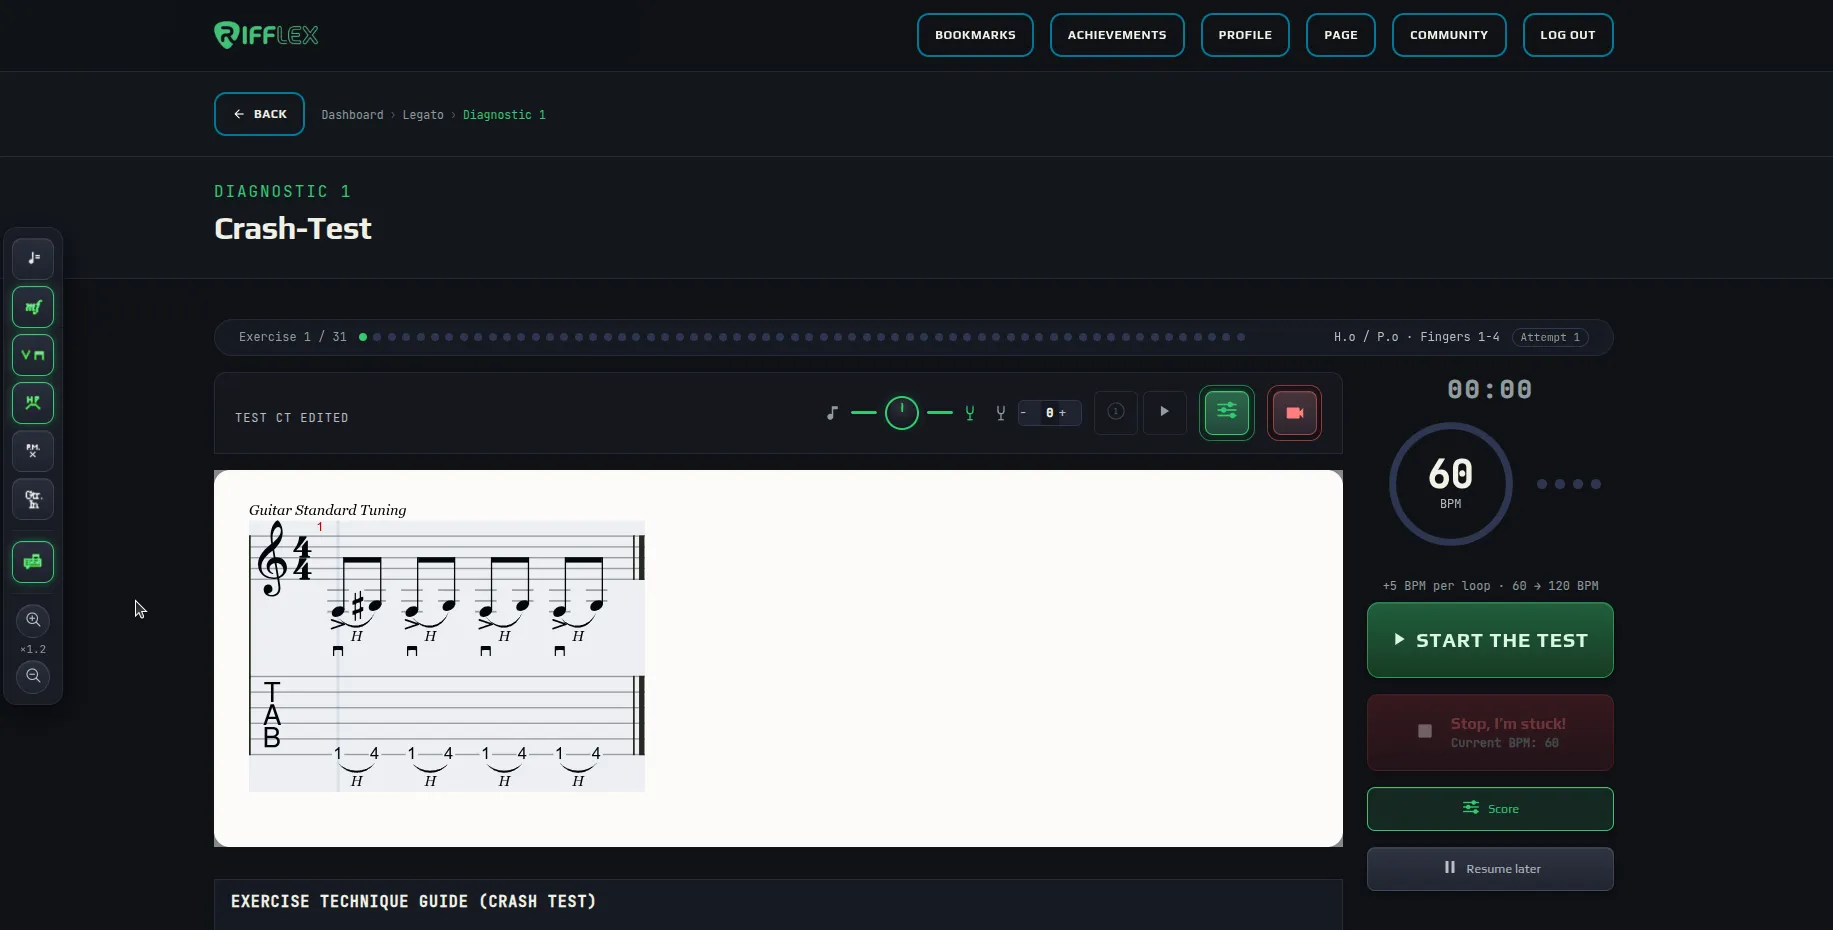
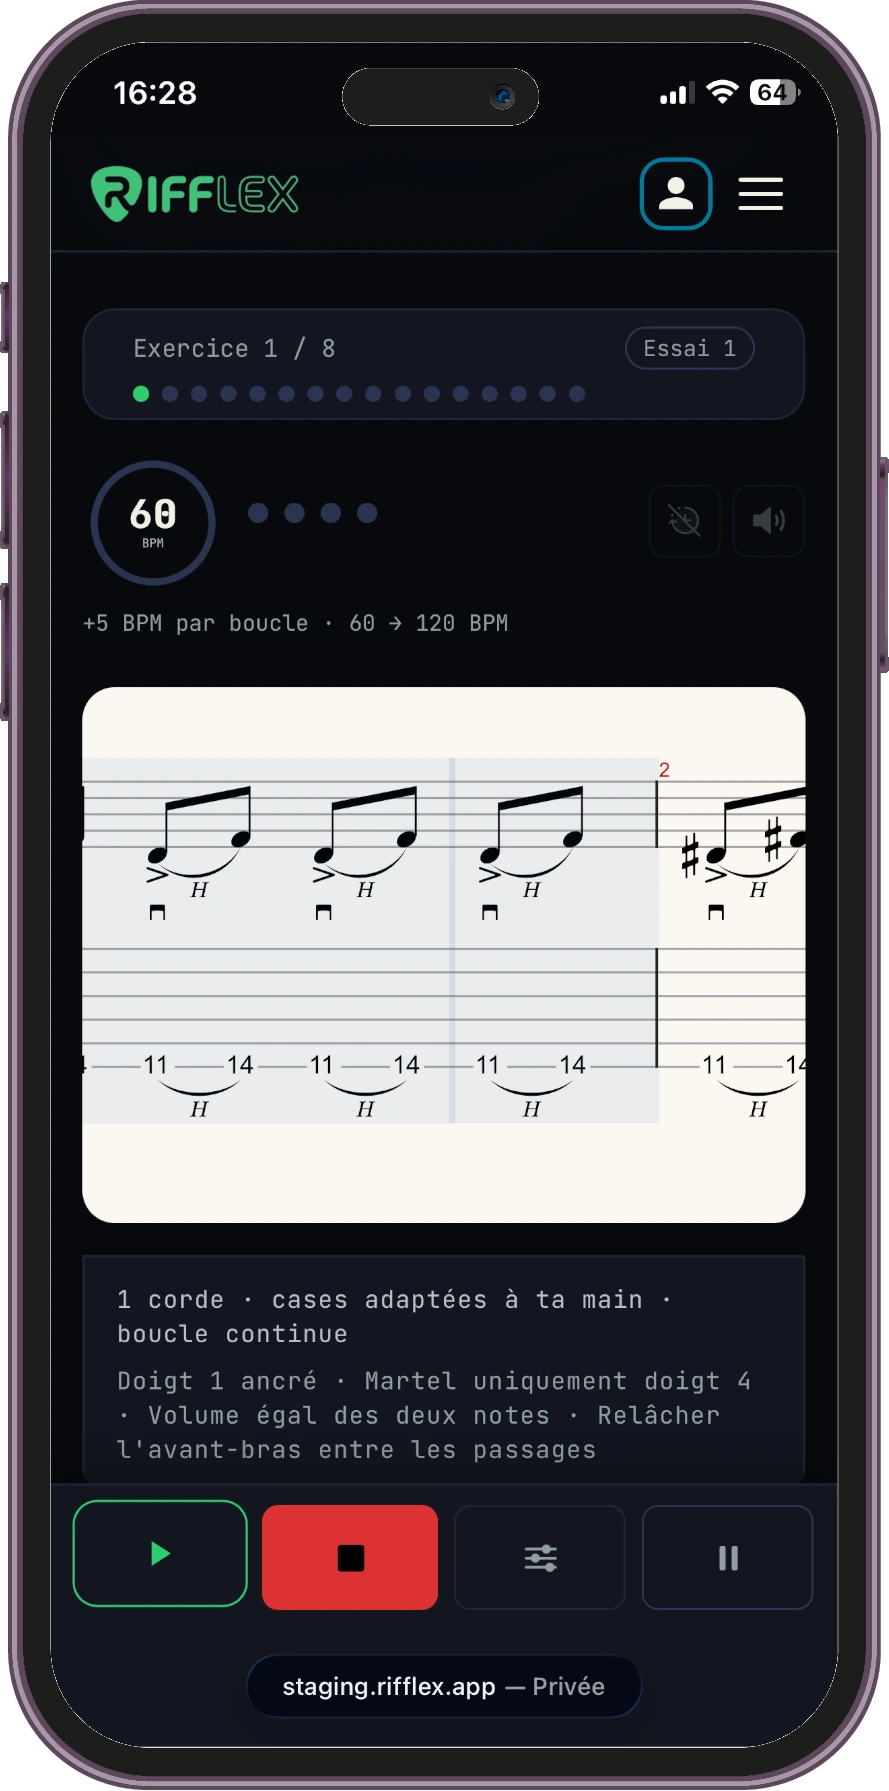
A Crash Test exercise, the way you play it.
- Exercise trail
- Exercise 1 of 31: one dot per stage, the motion being tested (here hammer-on and pull-off, fingers 1-4) and your attempt number.
- Calibrated tab
- The frets are picked from your hand measurements, not for an average hand.
- Metronome
- Starts at 60 BPM and adds 5 BPM every loop, up to 120 BPM.
- Start the test
- Starts the count-in, then the exercise.
- Stop, I’m stuck!
- Press it as soon as you can’t keep up: the tempo reached is saved for the report.
- Resume later
- Pauses the diagnostic: you pick it up where you left off.
Your report answers these questions, with numbers
Your report isn’t just another overall grade. Each chart answers one of those questions: the finger combination that limits you most, the motion that costs you the most BPM, the strings where your motions are hardest. Every answer comes from your own tempos, not from how it feels.
The diagnostic doesn’t judge your musicianship or your level. It pinpoints a block, and everyone has one. From there, practice becomes targeted: you spend your time on what actually holds you back.
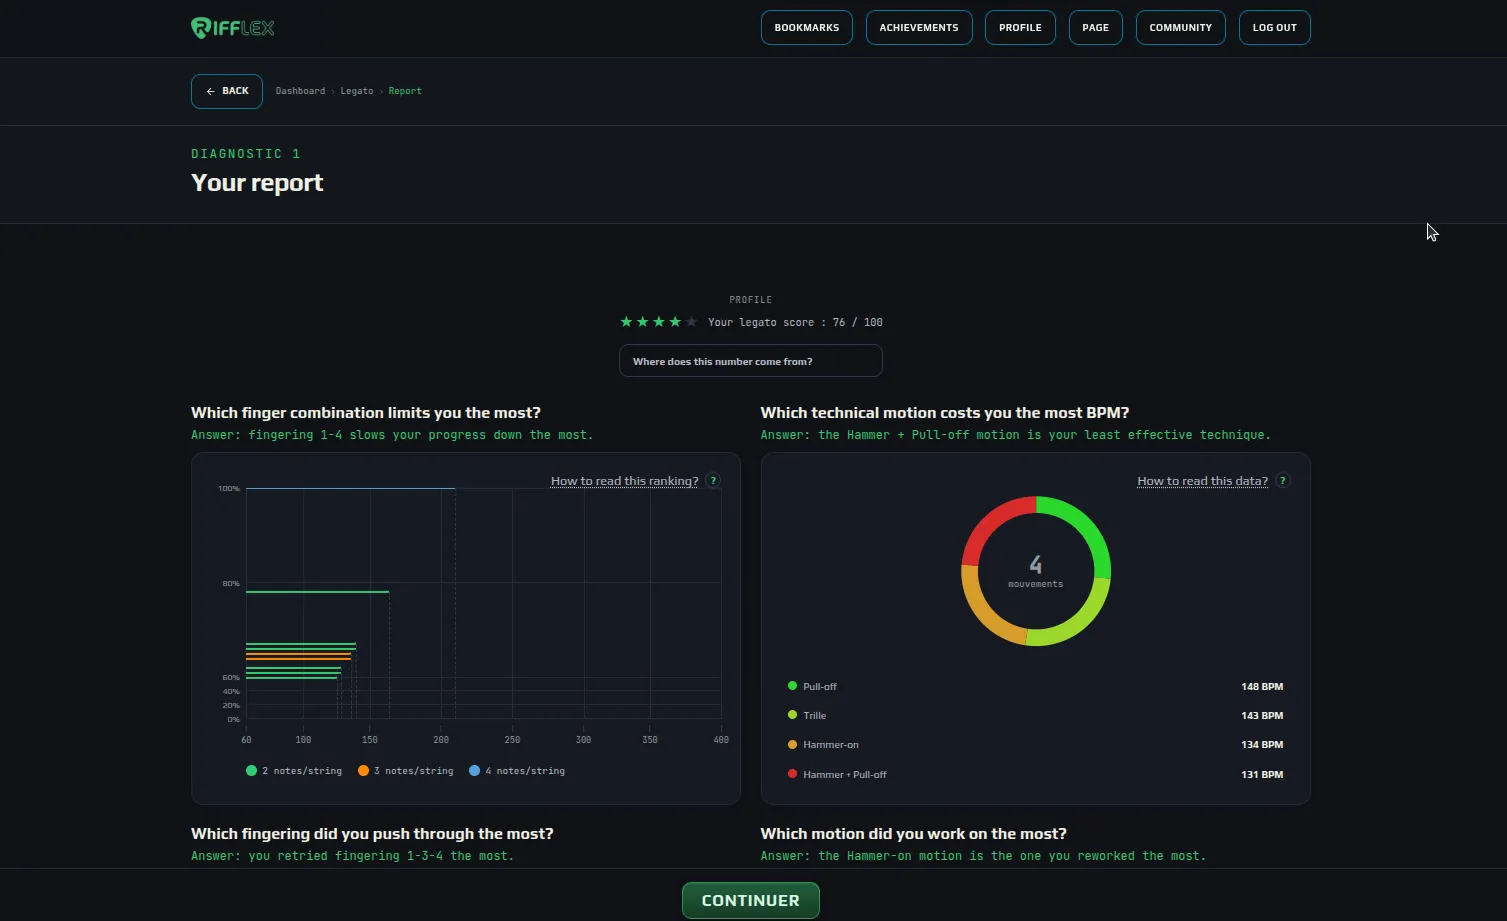
Your report: a score out of 100 (with how it’s calculated), then a series of charts. Each one asks a question and answers it in one sentence, drawn from your tempos.
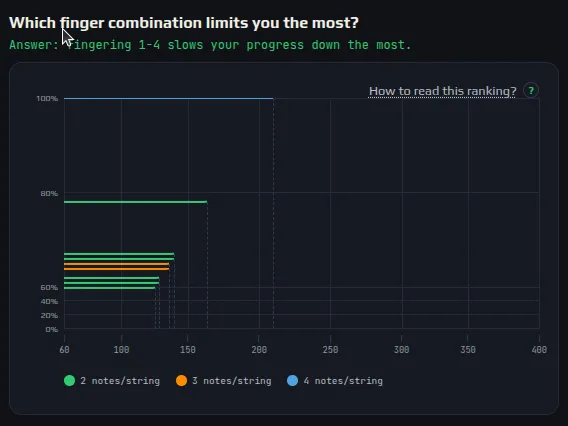
Each bar is a fingering, placed by the tempo reached; the colour shows 2, 3 or 4 notes per string.
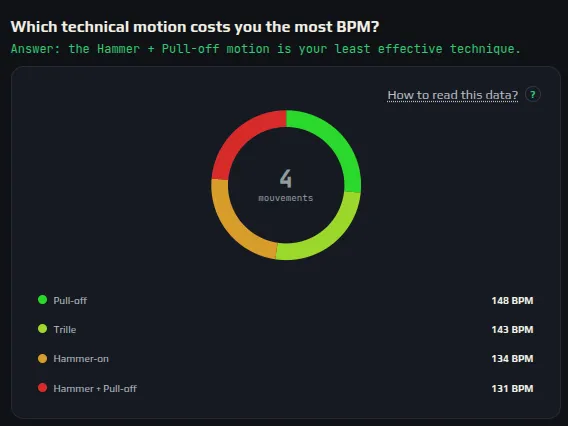
Your average tempo per motion: pull-off, trill, hammer-on, and both chained.
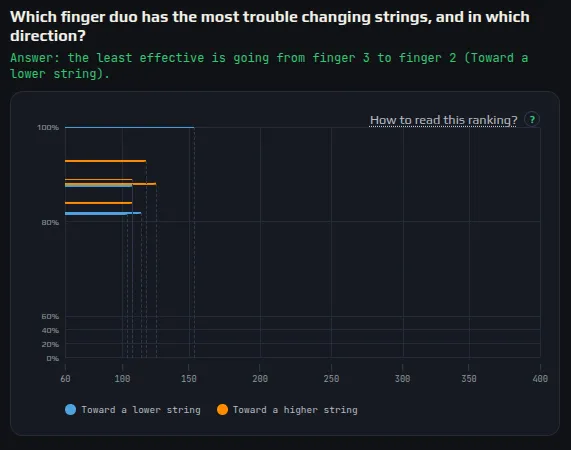
String changes, finger pair by finger pair, in both directions.
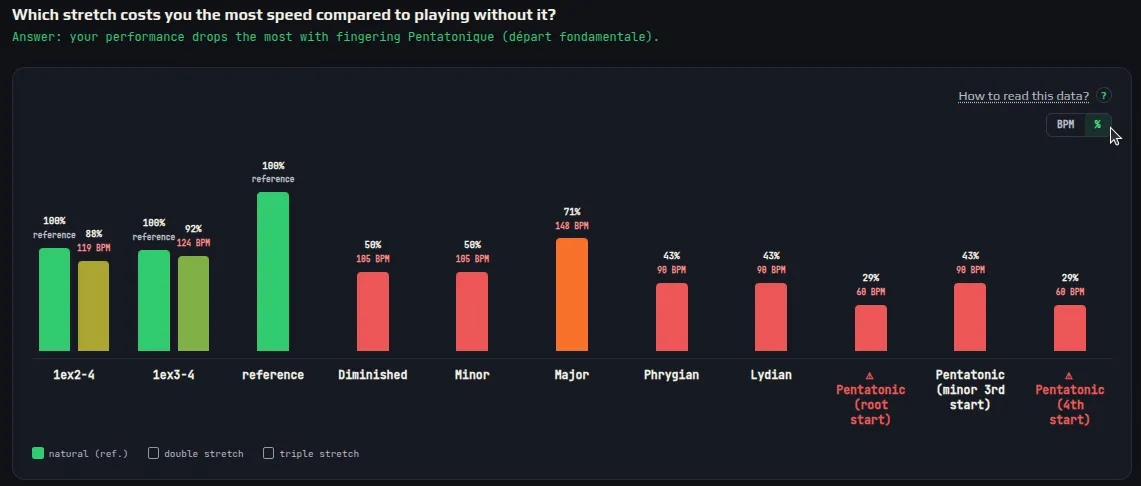
The cost of each stretch compared with your playing without one, in BPM or as a percentage. Fingerings flagged in red cost you the most.
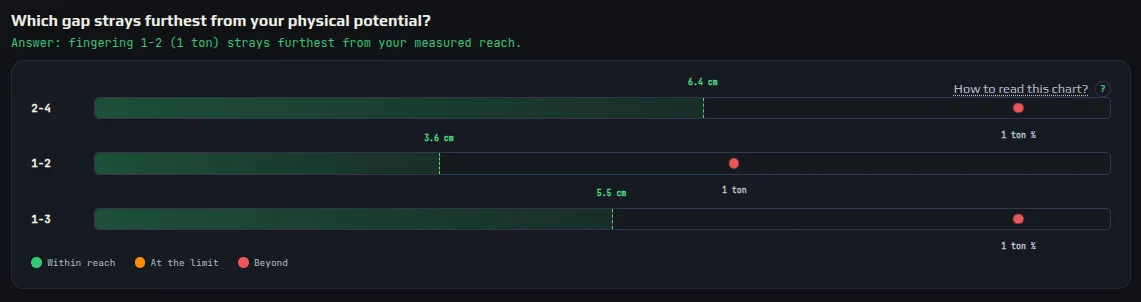
Crosses your hand scan with your results: the green bar is the gap your hand reaches, the dot the gap the exercise asks for.